More posts comming soon

I just realized that it’s been quite a while since I posted here.  More post are coming soon.  I have been doing some interesting things since my last post here are things that are coming soon.

Capital News Paper

I have been contacted by a reporter from the local news paper.  He wants to do a story on 3D printing which I think is fantastic.  Hopefully I can provide some insight in to how to get started with 3D printing.  This is all still preliminary since I have no idea on what to expect out of this.  More information as soon as I get it.

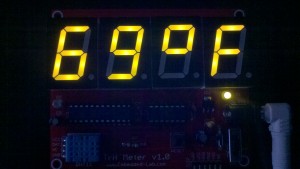
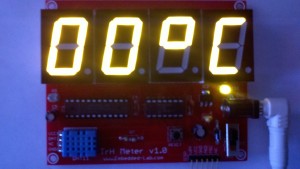
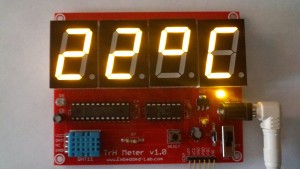
3D Printed Case for the TrH Meter

I have been trying to design a case from scratch and I have had little success.  I have tried quite a few 3D design tools and none of them live up to my expectations.  A friend recently send me a link to yet  another Ben Heckendorn video where he creates a raspberry pi case http://i.materialise.com/blog/entry/tips-and-tricks-by-ben-heck-how-to-use-autodesk-123d-design after watching this I got some ideas on how to use Autodesk 123D in a different way than I was using before (using the extrude method).  I will post a full tutorial on the creation process once I am done.
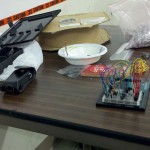
PCB Etching

I have been working with a friend to etch a PCB using the toner transfer method.  This is our first PCB that we have etched from scratch so it’s taking a bit longer than I expected.  Our first attempt did not meet our expectations and we decided to regroup and get better equipped.  As soon as we try again (maybe this weekend) I will post our results.  Here is the PCB we chose: http://vonkonow.com/wordpress/2012/10/nanino-the-diy-friendly-arduino/.  We did modify the schematic some.  We added back the voltage regulator and resided some of the holes for easier drilling.
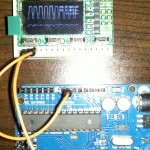
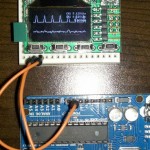
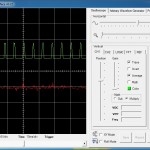
Simple Robot

I have done a bit more work on my mapping robot (that I have been almost never working on for over the last 10 years).  I added finally added the dual serial motor controller that I bought last year.  I make no promises on this project as at this point it has an estimated completion time of NEVER (+/- 5 years).

TrH Meter Kit – Part 2

I was able to obtain another MAX7219 chip for testing purpose and my problems were solved.

Working better

Working better

Working better

Working better

Working better

Working better

All of the segment light up correctly.  The one that was sent was definitely faulty.  I contacted the author of the meter and he offed to send me a replacement (when he is back form a conference).

Over all I like this kit it was relatively easy to put together and it has usefulness beyond honing my skills with soldering.  If I had to point out any negatives I would say that the components could have been tightened up to make the overall dimensions smaller.  This is a minor issue since I don’t really have any size constraints.

TrH Meter Kit

I ordered this kit https://tindie.com/shops/rajbex/pre-order-trh-meter-kit-3/ from tindi a few weeks ago and decided to assemble it while waiting for my printer to arrive.

TrH Meter Kit 2013-01-06_11-38-33_427

Assembly went fine and the instructions http://embedded-lab.com/blog/?p=6958 are easy to follow.

Once I powered it on however I ran into an issue.  When power is applied all of the seven segment displays light up all segments: 2013-01-06_13-13-28_629But as soon as it starts reading tempature and humidity none of the bottom most segments are working

Bottom segments not workingObviously it should say 25°C.  The only thing I could think is to reseat the ICS but no dice. I am not really sure where to go from here.  I posted http://embedded-lab.com/blog/?p=6958#more-6958 to try to get help and any help is appreciated.

Arduino on Breadboard

Went to Unallocatedspace (http://www.unallocatedspace.org/uas/) on Friday for their Arduino Night 14 Dec 6-10PM.  Had some fun putting together an Arduino kit (for $11).

Here is the instructions we followed: http://www.jameco.com/Jameco/workshop/JamecoBuilds/arduinocircuit.html

And here is the result:Here are more pictures of the night:

Mini Oscilloscope 2

I opened the box and plugged the scope in.  I connected it to an Arduino uno to see what it can do.  I set the Arduino to simply turn on the pin then turn it off then repeat and this is what I got.  I know its a super simple test but thats all I have time for at the moment.

Mini Oscilloscope

A friend pointed me to a Ben Heck episode in which he solders a mini oscilloscope to demonstrate surface mount soldering technique.  I thought this would be a fun and useful project to do so I ordered one: http://www.gabotronics.com/development-boards/xmega-xprotolab.htm

I opened the box last night to take look at all the SMC to get an idea first hand on what I am dealing with and to my surprise it was already fully assembled.  I was sort of disappointed that I did not get a chance to continue to hone my skill on SMC soldering but then I took a close look at the components on the board and realized that while I do think I can do it (if Ben can then so can I) it would have been quite a challenge.

Xprotolab-back

I haven’t fired it up yet but soon as I do I’ll share my impressions.